SOARVO allows you to create features to digitise on top of the data you have imported.
From the Feature Panel click New Feature Type
Give the feature a name ie Signpost and then click the icon to the right

Choose if it is a Point, Line or Polygon feature

And then give it a Style and Colour
You can then click the Attribute button to start to add attributes to the feature.
Give the attribute a name and then click the first icon to choose the attribute type

The attribute options are
Short Text – Single line of text
Long Text – Multiple lines of text
Radio Group – Single option selection list
Checkbox Group – Multiple option selection list
Numerical – Number field with range validation
Boolean – Yes / No
Date Time – Date with optional Time reference
File Upload – Attach jpg’s, PDFs. Word Documents to individual features.
Once you have chosen the attribute type, click the second icon to choose your options for that attribute

You can also choose if input is mandatory

Once you have created all of your attribute fields you can reorder them by clicking to drag the 6 dots icon

Creating a Feature
Once you have a feature setup, click and highlight the feature to be able digitise on the map

Click on the map to choose its location and then select the pencil icon to edit the attributes and complete the data entry

Save the feature to store the location along with the attributes.
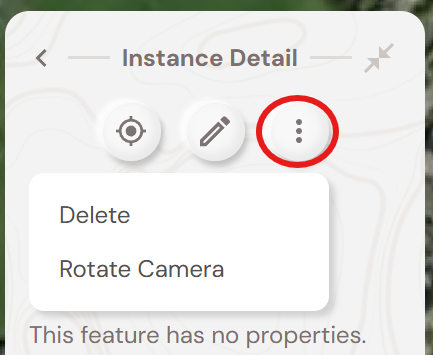
Deleting a Feature
To delete a feature make sure you are in Select Mode and click one the feature you wish to delete

Once the feature is selected click on the 3 dots and choose Delete from the menu